Speech Recognition feature is available in Microsoft Windows Vista/7 Operating System (OS), but is not available in Microsoft Windows XP OS. If you are not using Microsoft Windows Vista/7
Ultimate/Enterprise OS, you cannot install the Windows 7 language packs (eg: Simplified Chinese language pack). Without the Simplified Chinese language pack, you cannot configure the Speech Recognition feature to recognize spoken Chinese and shown Simplified Chinese wordings as you speak in Microsoft Word 2010.
Speech Recognition is available only in
English (US or UK), French, Spanish, German, Japanese, Simplified Chinese and Traditional Chinese language. If you speak Japanese, you can install the Japanese language pack through Windows Update, configure the Speech Recognition feature to recognize spoken Japanese and shown Japanese wordings as you speak in Microsoft Word 2010.
Chinese speech to text procedures in Microsoft Word 2010Assume that you are using Microsoft Windows 7 Enterprise SP1 (x86) OS.
- Windows Speech Recognition is available only when the language of the OS matches the language (eg: Simplified Chinese language) of the Windows Speech Recognition. Before you start to use the Speech Recognition feature, please set your computer OS language to Simplified Chinese language as shown below:
a) In Windows 7, kindly click "Start" -> "Control Panel" -> "Region and Language"
b) Under "Region and Language", kindly click the "Keyboards and Languages" tab. Under "Please choose a display language:", please select "中文简体" (Simplified Chinese) . Kindly click the "Apply" button and (save any unsaved work first) click the "Log off now" button. Kindly login again and your Windows environment will be displayed in Simplified Chinese language.
How to install the Simplified Chinese (中文简体) language pack in Windows Vista/7 OS
If the Simplified Chinese (中文简体) language is not shown in the "Region and Language", please install the Simplified Chinese language pack [Chinese (Simplified) Language Pack - Windows 7 (KB972813)] from the Optional Updates section in the Windows Update. Windows Vista/7 language packs are only available for computers that are running Windows Vista/7 Ultimate/Enterprise OS.
In Windows Update, kindly click the "Check for updates". Then, click the "xx optional updates are available" link for the language packs. If the optional update links cannot be found, kindly click the "Check online for updates from Microsoft Update" to search for the optional updates. Under the Windows Vista/7 Language Packs category, please select the "Chinese (Simplified) Language Pack - Windows 7 (KB972813)" language pack.
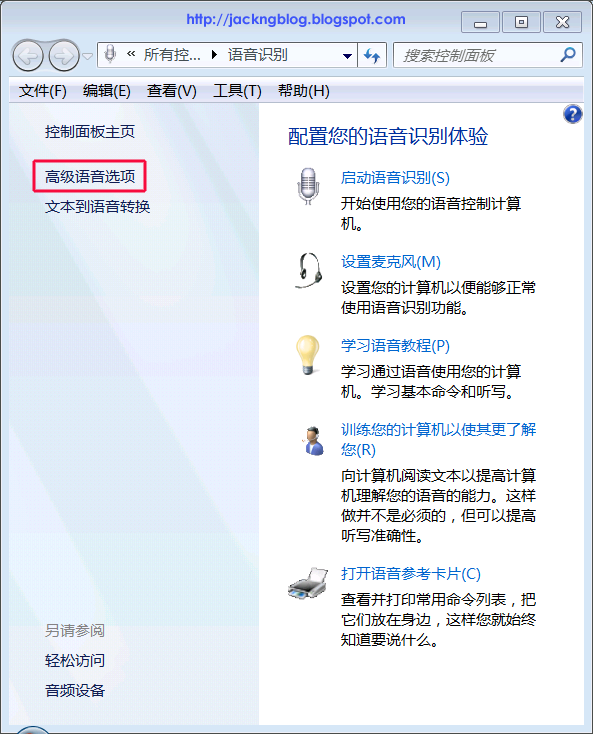
- Kindly click "Start (开始)" -> "Control Panel (控制面板)" -> "Speech Recognition (语音识别)" -> "Advanced speech options (高级语音选项)".
Please change the "Language (语言)" from "Microsoft Speech Recognizer 8.0 for Windows (英语 - 美国 or English - US)" to "Microsoft Speech Recognizer 8.0 for Windows (简体中文 or Chinese Simplified - PRC)".
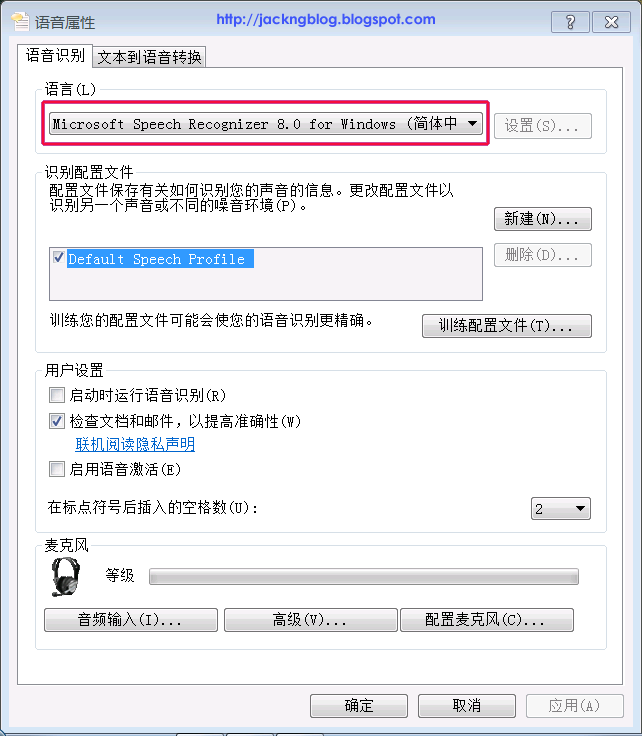
Click the "OK (确定)" button.
- Please plug in your head-mounted microphone (头戴式麦克风。设置麦克风时,微软把头戴式麦克风归类为耳机式麦克风。) to your computer and click the "Set up microphone [设置麦克风(M)]" in the Speech Recognition (语音识别).
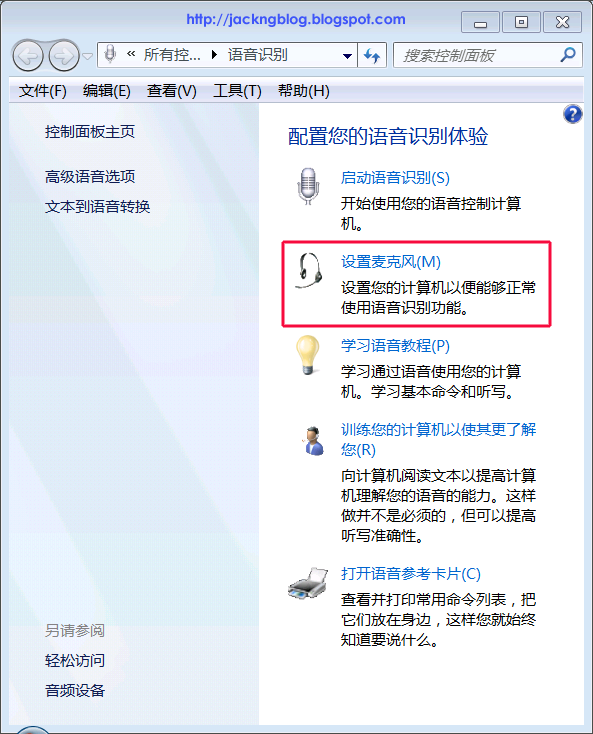
This will set up your computer to work properly with Speech Recognition (语音识别). Other types of microphones (eg: tabletop/desktop microphone) are not recommended because it will tend to pick up the surrounding environmental noise as you speak.
Increase the head-mounted microphone input sound level
If the head-mounted microphone input sound level is low, the computer will indicate that it cannot hear your voice clearly at the end of the "Set up microphone [设置麦克风(M)]" in the Speech Recognition (语音识别).
- If your head-mounted microphone comes with a "Volume control" knob, please check and turn the knob to the highest volume level.
- Kindly click "Start (开始)" -> "Control Panel (控制面板)" -> "Sound (声音)". Under the "Recording (录制)", click the "Microphone (High Definition Audio Device)" to select it, and then click the "Properties (属性)" button.

Under the "Microphone Properties", click the "Levels (级别)" tab. I adjust the headphone level from 27 (default) to 80, and leave the "Microphone Boost" at 0.0 db.
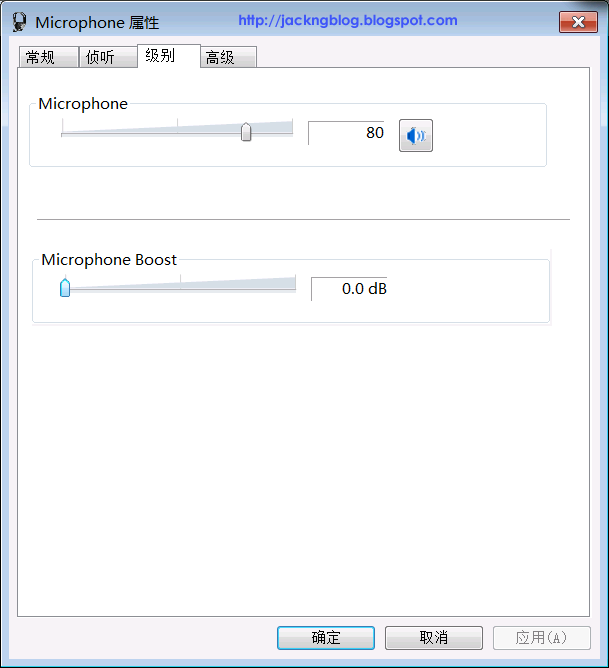
Click the "OK" button twice.
Speech UX Configuration has stopped working error
During the "Set up microphone [设置麦克风(M)]" in the Speech Recognition (语音识别) stage, I faced the "Speech UX Configuration has stopped working" error whenever I try to set up the microphone. After clicking the "Close program" button, the Speech Recognition (语音识别) was not responsive. If you ignore the "Speech UX Configuration has stopped working" error and start the Speech Recognition (语音识别), it can start successfully. However, it will produce a "Speech Recognition has stopped working" error when you try to activate the Speech Recognition to "Listening" mode.
I performed a disk check with fix disk errors by using the command "chkdsk c: /f", reboot my computer and check disk has fixed the c:\ drive free space marked as allocated error. However, the "Speech UX Configuration has stopped working" error still existed.
Suspecting that the "Default Speech Profile" that I am using in the Speech Recognition (语音识别) has corrupted due to the hardisk error, I use the "Windows Speech Recognition Profile Tool" to restore my speech profile from a backup .wsrprofile file. During the restore stage, I choose to create a new speech profile call JackNg. I did not want to restore to the current speech profile because this will overwrite the current speech profile and any training data will be lost. However, after selecting the new speech profile, JackNg in the "Advanced Speech options" of the Speech Recognition, the "Speech UX Configuration has stopped working" error still existed when I tried to set up my microphone.
In the end, I have to restore (For Windows 7, kindly click "Start" -> "All Programs" -> "Accessories" -> "System Tools" -> "System Restore") my computer to the date where I have successfully used the Speech Recognition (语音识别) in order to solve the "Speech UX Configuration has stopped working" error.
- After setting up your microphone, please click the "Train your computer to better understand you [训练你的计算机以使其更了解你(R)]" in the Speech Recognition (语音识别).
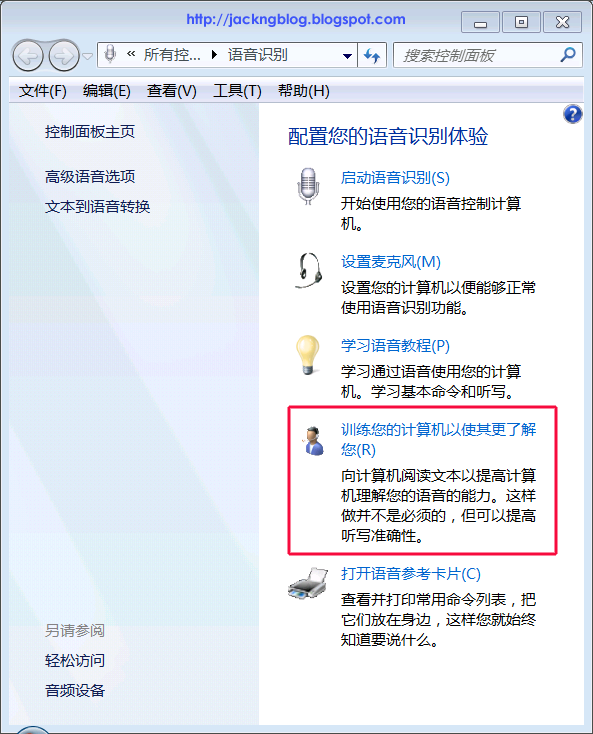
By reading text to your computer will improve your computer's ability to understand your voice and help to improve dictation (听写, 口述) accuracy. After training your computer to better recognize your voice, it is advisable to backup your speech profile by using the "Windows Speech Recognition Profile Tool".
- In the Speech Recognition (语音识别), kindly click the "Start Speech Recognition [启动语音识别(S)]".
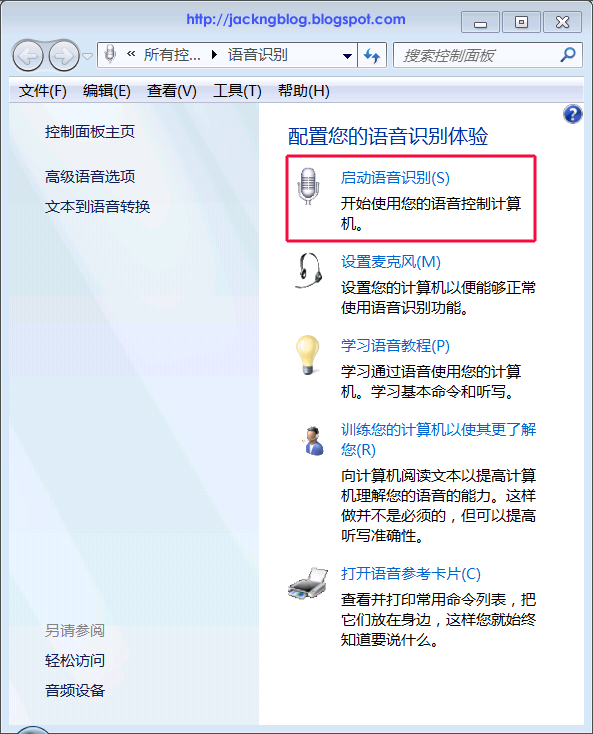
If you want to automatically run Speech Recognition during the computer start up, please click "Start (开始)" -> "Control Panel (控制面板)" -> "Speech Recognition (语音识别)" -> "Advanced speech options (高级语音选项)". Under "User Settings", please check the "Run Speech Recognition at startup" (启动时运行语音识别).
- Kindly open Microsoft Word 2010. If the Speech Recognition is in the "Off (关)" stage, kindly click the Speech Recognition “microphone” button to activate it to "Listening (正在聆听)" stage. You can start to speak your desire Chinese language to the computer.

Microsoft Word 2010 will automatically detect your spoken Chinese language and shown your spoken Chinese as Simplified Chinese wordings as you are speaking.
If you place the mouse arrow over the Speech Recognition “microphone” button and right-click, you can get more menu options on the Speech Recognition.

For example, you can right-click the Speech Recognition “microphone” button and select the "Open Speech Dictionary (打开语音词典)" to "Add a new word (添加字词)" to enable your personal words, or expressions to be dictated into your applications.
Improving the Chinese language dictation accuracyTo improve the Chinese language dictation (听写, 口述) accuracy, it is recommended to add a new word with a short phrase one at a time and not the whole sentence. For example, for the below Chinese sentence:
莫名其妙的生来, 无可奈何的活着,不知所然的死掉。I will add one short phrase such as "莫名其妙", "生来", "无可奈何", "活着", "不知所然", "死掉" one at a time to the Speech Dictionary (
语音词典) and not the whole sentence into the Speech Dictionary (
语音词典).
However, even after training the computer a few time to better understand my voice, it still does not make much improvement to the Chinese language dictation (听写, 口述) accuracy for certain Chinese wordings that have identical pronunciation. For example, for the Chinese wordings "
死掉", despite already adding the "
死掉" wordings to the Speech Dictionary (
语音词典) with my own voice pronunciation, Microsoft Speech Recognition still tends to give me the below result for "
死掉":
撕掉辞掉事要视角时要In Microsoft Word 2010, I found that choosing the input Chinese as "
微软拼音 - 简捷 2010" makes the Microsoft Speech Recognition produces more accurate Chinese output than "微软拼音 - 新体验 2010". If I choose "
微软拼音 - 简捷 2010", out of 10 tries, the Chinese words "
死掉" shown about 9 times correctly. Speaking in a quiet environment and has a good quality head-mounted microphone which is placed near to my mouth also help to increase the accuracy. However, I think my Chinese language pronunciation still has spacious room for improvement when using the Microsoft Speech Recognition to show spoken Simplified Chinese wordings in Microsoft Word 2010.
Windows Speech Recognition Profile ToolPlease download the Windows Speech Recognition Profile Tool from
http://www.microsoft.com/en-us/download/details.aspx?id=16296.
Supported operating systems: Windows 7 and Windows Vista
The Windows Speech Recognition (WSR) Profile Tool enables a Windows Speech Recognition user to easily back up and restore his or her speech profile. These procedures become handy when transferring a speech profile between computers, or when archiving complex speech profiles.
References:- Set up Speech Recognition
- Windows 7 language packs are available for computers that are running Windows 7 Ultimate or Windows 7 Enterprise
- Download languages for Windows